

To combine photos into one PDF, add the images, arrange them in page order, and create the file. Image to PDF accepts up to five JPG, PNG or WebP images at a time. It puts each image on its own page and makes the PDF in your browser.
How to turn photos into one PDF
- Open Image to PDF and choose your saved images. You can mix JPG, PNG and WebP files.
- Drag the images into the order you want, or use the up and down arrows. Choose portrait or landscape for the PDF pages.
- Select Create PDF, then Download PDF. Check the downloaded file before you send it.
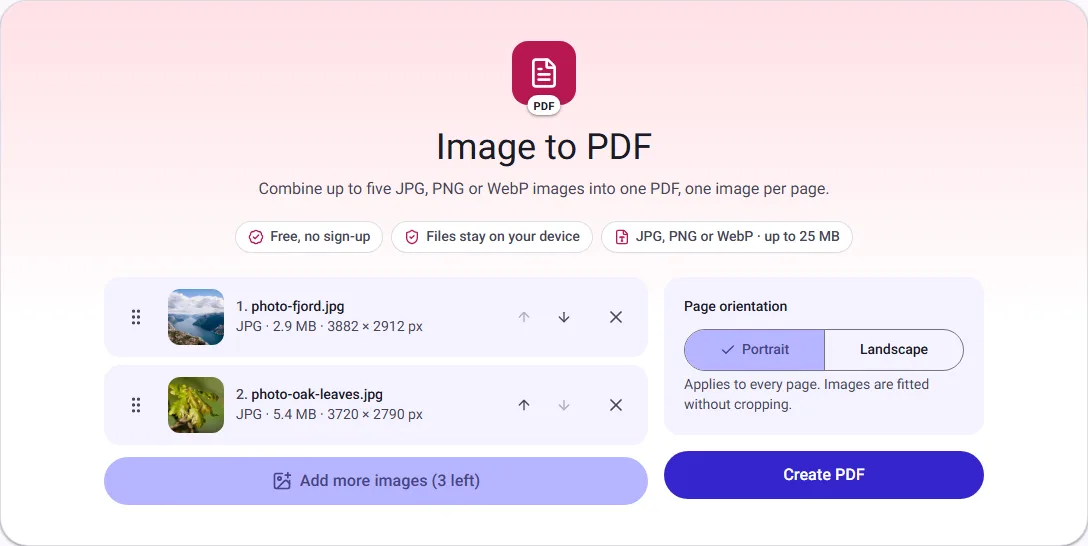
The order in the list is the order of the pages. If you have more than five images, make separate PDFs and use Merge PDF to join them. The guide to merging PDF files in the right order covers that next step.
A two-photo example
We used Image to PDF to combine two public-domain JPG photos: a fjord landscape and oak leaves. The result had two pages and was 8.3 MB, about the size of the two photos together. This illustrates why turning large photos into a PDF does not automatically make them smaller.
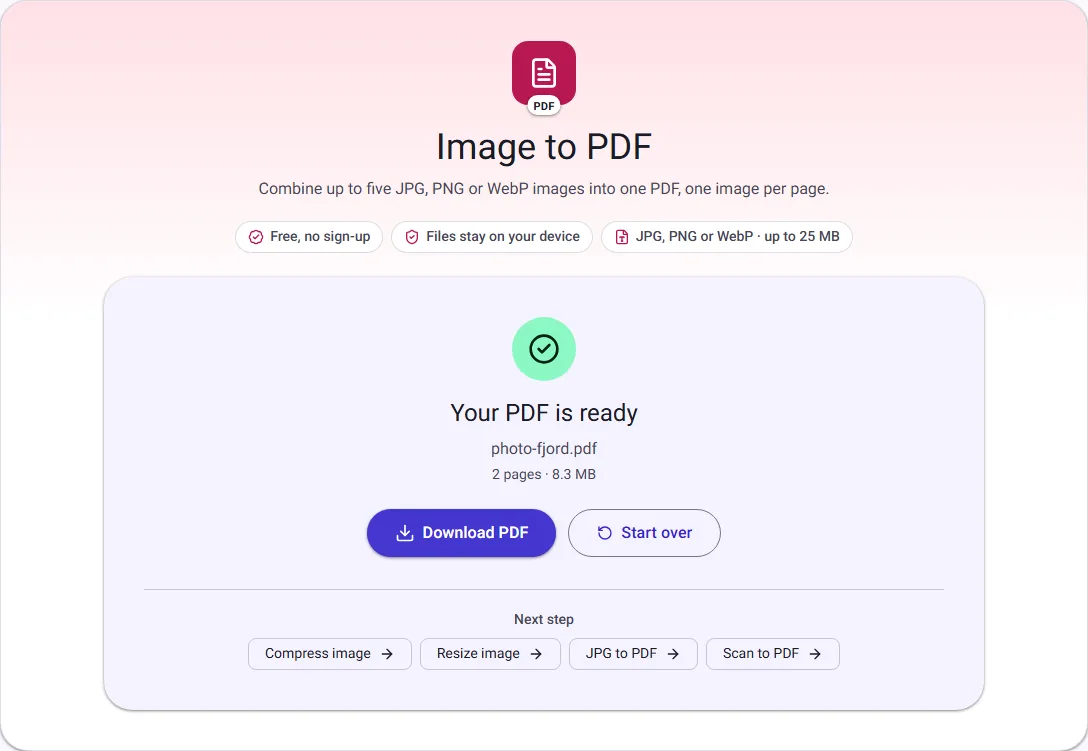
The PDF keeps each full-resolution image; it simply gives the images fixed pages and an order.
Before creating your PDF, decide which photo should be page 1. Move it to the top of the list; the download follows the order shown there. If you need a cover page or a different sequence, arrange that before selecting Create PDF.
Choose a page layout that fits your photos
Each image goes on a separate A4 page, centred inside a half-inch margin. The tool scales the image to fit without stretching or cropping it. Portrait or landscape applies to every page in the PDF, so a mix of tall and wide photos may leave more white space around some images. Choose the orientation that suits most of the set, then inspect the result.
Photos from phones come out upright. When a phone records that a photo was taken turned, the tool turns it the right way before placing it on the page.
Transparent parts of PNG or WebP images show the white page behind them. If those transparent areas matter, check the PDF after downloading it.
Keep the PDF size manageable
Most JPG photos are embedded without another round of compression. PNG images and images with transparency are stored as PNG; other images may need conversion before they go into the PDF. The result can therefore be close to the combined size of your images, or larger depending on their formats.
For an email or upload size limit, resize or compress the images before making the PDF, and compare the result at the size you will read or print. You can also try Compress PDF afterward. Our guide to reducing PDF size explains why some files shrink and others do not.
Getting the order right first time
- Rename files with numbers before choosing them, such as 01-cover.jpg and 02-page.jpg, so they start in a sensible order.
- Put the most important page first. Many people only look at page 1 of an attachment.
- Check the page count in the list before you create the PDF: a missing or doubled photo is easy to spot there.
Check the PDF before you send it
Open the downloaded PDF and scroll through every page. Check that no photo is sideways; if one is, turn it with Rotate image and make the PDF again, or turn that page afterwards with Rotate PDF. Then check the size against the limit of wherever you are sending it.
Saved photos or new photos of paper?
Use Image to PDF when the pictures are already on your device. If you need to photograph pages of a letter or form with your phone, Scan to PDF can take the photos and offer a document look for darker text and whiter paper. Neither tool recognises text in the pictures, so words in the resulting PDF cannot be searched or copied as text.
Both tools create the PDF in your browser rather than uploading your images. For saved JPGs only, JPG to PDF provides a JPG-specific page for the same conversion.
Questions people ask
Can I choose Letter-size pages? Not at the moment. Every page is A4, which prints on Letter paper with a slightly smaller margin when you choose "fit to page" in the print settings.
Does the PDF contain my photos' location data? It can. JPG photos placed as they are keep their camera details inside the PDF, including the GPS location if your phone recorded it. To leave those details out, run the photos through Compress image first, which creates new images from the pixels only.
Can I add a photo to an existing PDF? Make a PDF of the photo, then join the two files in the right order with Merge PDF.
How we measured
On 30 September 2026, we used our own Image to PDF tool in Chrome with two public-domain images from Wikimedia Commons: a fjord landscape and oak leaves with flowers. The two-page PDF was 8.3 MB; MB here means 1024 × 1024 bytes. On 17 October 2026 we repeated it for the screenshots and got the same 8.3 MB. Your result will depend on your images and their formats.

