

To reduce PDF size, shrink the photos and scanned pages inside it: they almost always make up most of a large PDF. Scaling them to a sensible resolution and saving them again as JPG can cut a photo-heavy PDF by 90% or more, while text stays sharp. Try it with Compress PDF; it shows the real size before and after, and gives your original back if it cannot be made smaller.
This guide explains what makes a PDF large, shows our measured results at each compression level with screenshots, and covers what to do when a PDF will not shrink, which happens more often than most compression sites admit.
What actually makes a PDF large
A page of text needs a few kilobytes: letters are stored as characters plus a font, not as pictures. A single photo from a phone, on the other hand, is typically several megabytes, and scanners often save every page as a high-resolution image. So when a PDF is tens of megabytes, look at its images first.
A quick way to tell: if you can select the text in your PDF reader, the pages are real text and are probably small already. If the whole page highlights as one block, the page is a picture (a scan or a photo), and that is where the size is.
How to reduce PDF size step by step
- Open Compress PDF and choose your PDF.
- Pick a Compression level. Recommended suits most files; Strong makes the smallest file with softer images; Light only tidies the file's structure.
- Select Compress PDF, check the before and after size, then Download PDF.
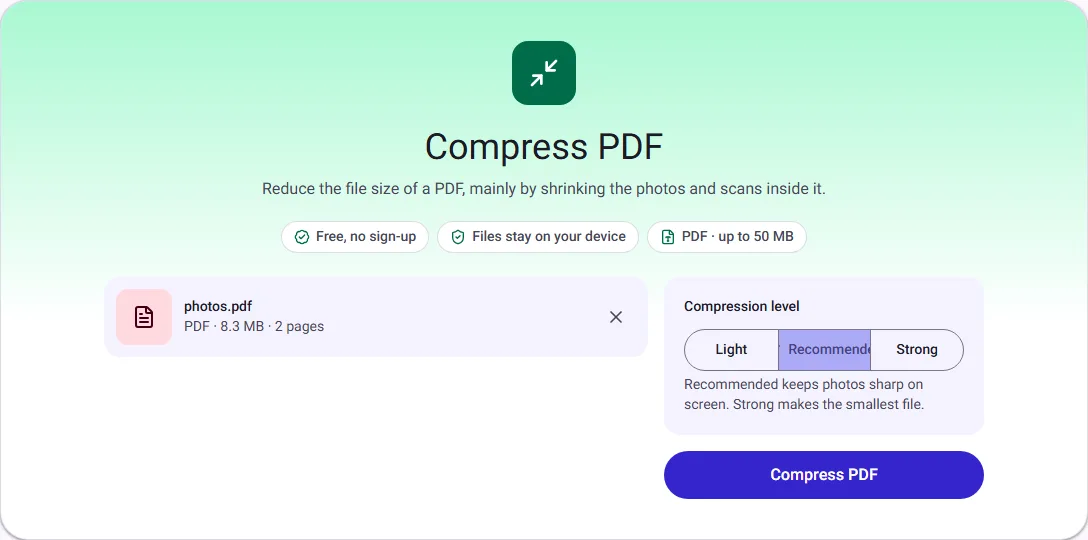
Reducing PDF size in real numbers
We made a two-page PDF from two public-domain photos with our Image to PDF tool. Because it places JPG photos into the PDF without re-compressing them, the result was 8.3 MB, about the size of the two photos together. Then we compressed it with Compress PDF:
| Level | What it does | Result |
|---|---|---|
| Light | Reorganises how the file is stored; images untouched | Not smaller, original returned |
| Recommended | Photos fitted within 2000 pixels, JPG quality 72 | 404.8 KB, 95% smaller |
| Strong | Photos fitted within 1400 pixels, JPG quality 55 | 152.9 KB, 98% smaller |
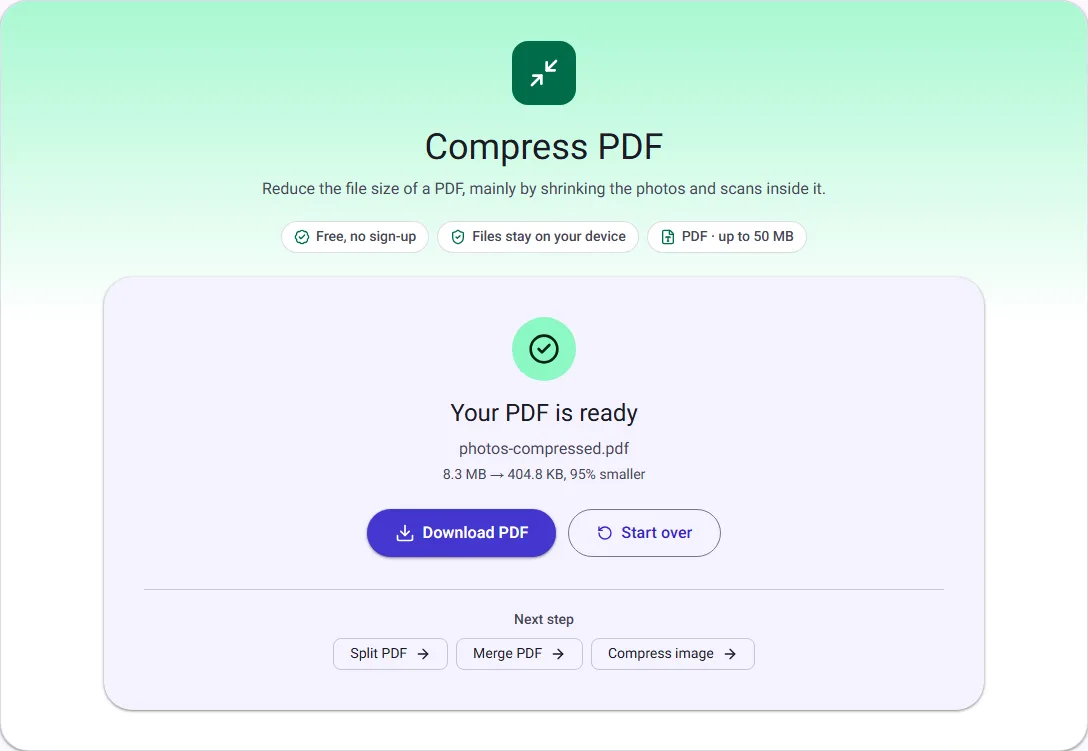
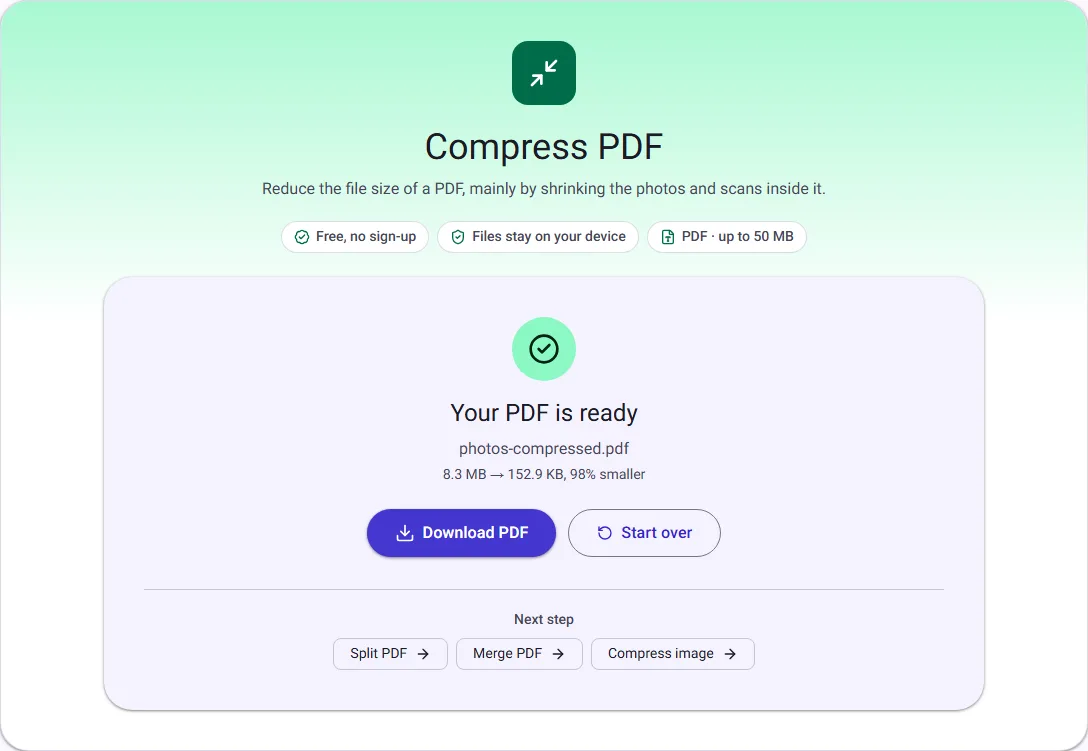
Recommended is the right choice for most documents you read on screen or print on an office printer. A 2000-pixel photo across an A4 page works out at roughly 240 dots per inch, which prints sharply on a typical office printer. Strong suits PDFs where the images only need to be recognisable, for example ID documents for an online form with a 200 KB limit.
Why some PDFs will not shrink
We also compressed a 10-page text-only report at the Strong level. It was 14.3 KB, and nothing could make it smaller, so the tool returned the original file unchanged and said so.
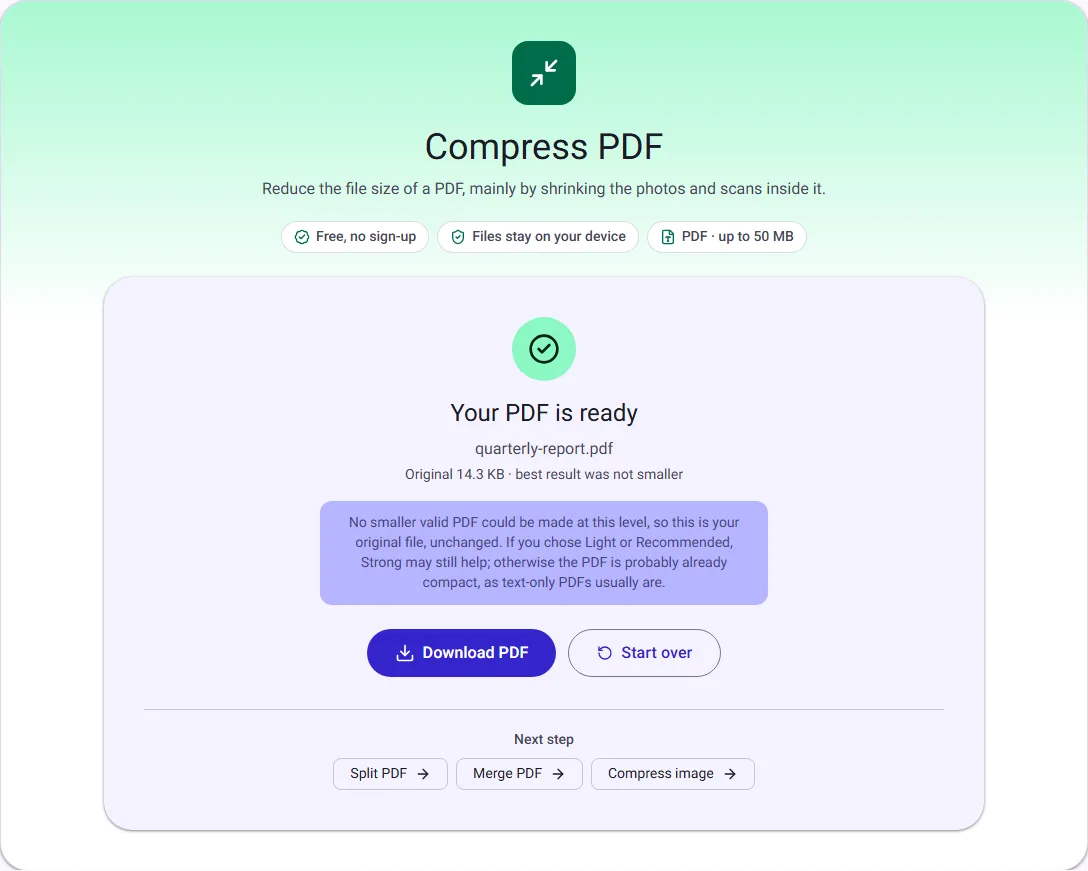
That is normal. Text-only PDFs exported from word processors are already compact. Other PDFs resist compression because their images are stored in ways that cannot be re-saved safely, such as images with transparency or print-style CMYK colour, which our tool deliberately leaves alone rather than risk changing how they look. Be wary of any tool that promises a fixed percentage for every file: the only honest answer is the measured size.
Which level should you choose?
- Emailing a document. Most email services limit attachments to about 20 to 25 MB; Gmail's limit is 25 MB. Recommended usually brings a photo-heavy PDF well under that.
- Uploading to a portal with a small limit. Job, university and government portals often accept only 1 or 2 MB, sometimes less. Start with Recommended; if it is still too big, try Strong.
- Archiving or printing. Keep the original, or use Light, which never touches the images.
- Sharing on a website. Recommended keeps photos sharp on screen while loading quickly on phones.
If even Strong is not enough, the document probably has many pages of scans. Splitting it, or removing pages that are not needed, will do more than any compression setting.
Other ways to get a PDF under a limit
- Split it. If an email or upload limit is the problem, send the document in parts made with Split PDF.
- Shrink the images before making the PDF. When you build a PDF from photos, resizing them first with Compress image gives you control over each one. The guide to reducing image size shows how.
- Remove pages you do not need. Blank scan pages and duplicate appendices add size for nothing. Use Delete PDF pages.
- Scan at a lower resolution next time. 200 to 300 dpi is plenty for documents; 600 dpi scans are mostly wasted space.
Common mistakes and how to avoid them
- Compressing the same file over and over. Each pass at the same level gains little or nothing after the first, while photos lose a little more detail. Compress your original once, at the level you need.
- Using Strong for documents that will be printed in high quality. Strong is for screen and upload limits. For brochures or photos that will be printed, keep Recommended or the original.
- Deleting the original. Once images are saved at a lower resolution, the lost detail cannot be recovered. Keep the original until you are happy with the result.
What compression does not change
Text, fonts and drawings are kept exactly, so text stays sharp and selectable. Only large photos and scans are made smaller, and every compressed file is checked to contain all its pages before you can download it. Your PDF is compressed inside your browser tab and is never uploaded.
How we measured
On 17 October 2026 we used our own Image to PDF and Compress PDF tools in Chrome; the screenshots and numbers are from that run and match our first measurements on 30 September 2026. The photo PDF was made from two public-domain images from Wikimedia Commons: a fjord landscape (CC0) and oak leaves with flowers (CC0). The text-only report is a 10-page sample we generated, with no real data. Sizes are the downloaded files, in KB and MB of 1024 bytes.

