

To reduce image size for a website, first resize the image to the largest width it is shown at, then compress it. Resizing removes pixels nobody sees; compressing then stores the remaining pixels efficiently. In our test, those two steps took a 2.9 MB photo down to about 200 KB with no change you would notice on a web page. Start with Resize image, then use Compress image.
Large images are the most common reason a page loads slowly, especially on phones. They also cost visitors mobile data and can hurt how search engines rate your page experience. This guide walks through both steps with screenshots from our tools and real numbers, and lists the mistakes that undo the savings.
Step 1: resize to the displayed width
A phone photo is often around 4000 pixels wide, while a blog post or product page usually shows images at 800 to 1600 pixels. Every extra pixel is downloaded and then thrown away by the browser.
Work out the widest your layout shows the image, and double it only if you want extra sharpness on high-density phone and laptop screens. For a full-width image on a typical site, 1600 pixels wide is a common choice. For an image in a blog column of 700 pixels, 1400 pixels covers high-density screens.
- Open Resize image and choose your photo. Its size in pixels is shown next to the file.
- Type the new Width (px). With Keep aspect ratio on, the height follows automatically, so the photo is not stretched.
- Select Resize image and download the result.
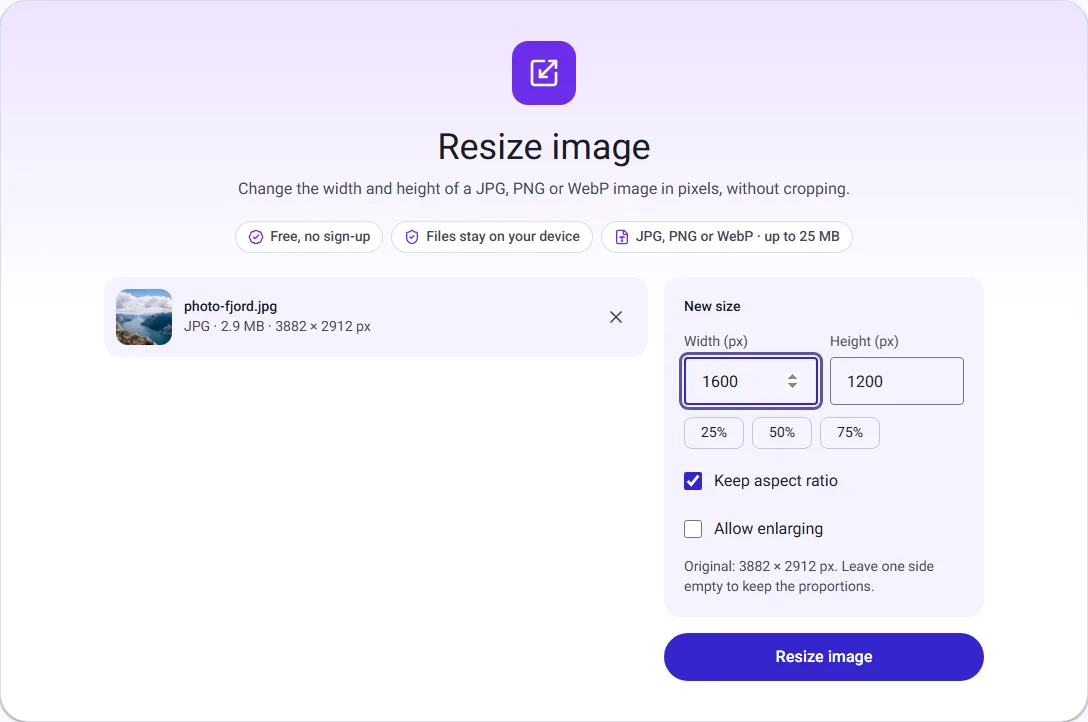
Our test photo (3882 × 2912 pixels, 2.9 MB) resized to 1600 pixels wide became 501 KB, about a sixth of the original, before any extra compression.
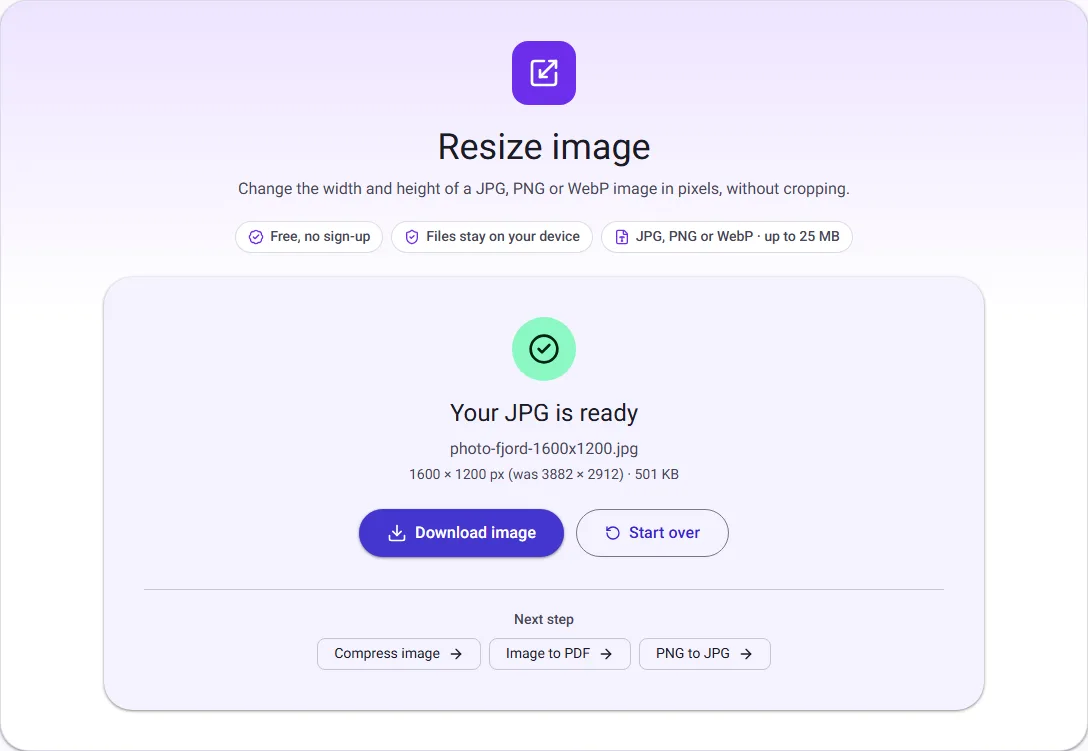
Step 2: compress
Then compress the resized image. For photos, a quality between 60 and 80 is usually a good range; check the result at the size it will be shown.
- Open Compress image and choose the resized photo.
- Leave the format as it is, or choose WebP, and set the Quality. We used 75.
- Select Compress image and compare the before and after size.
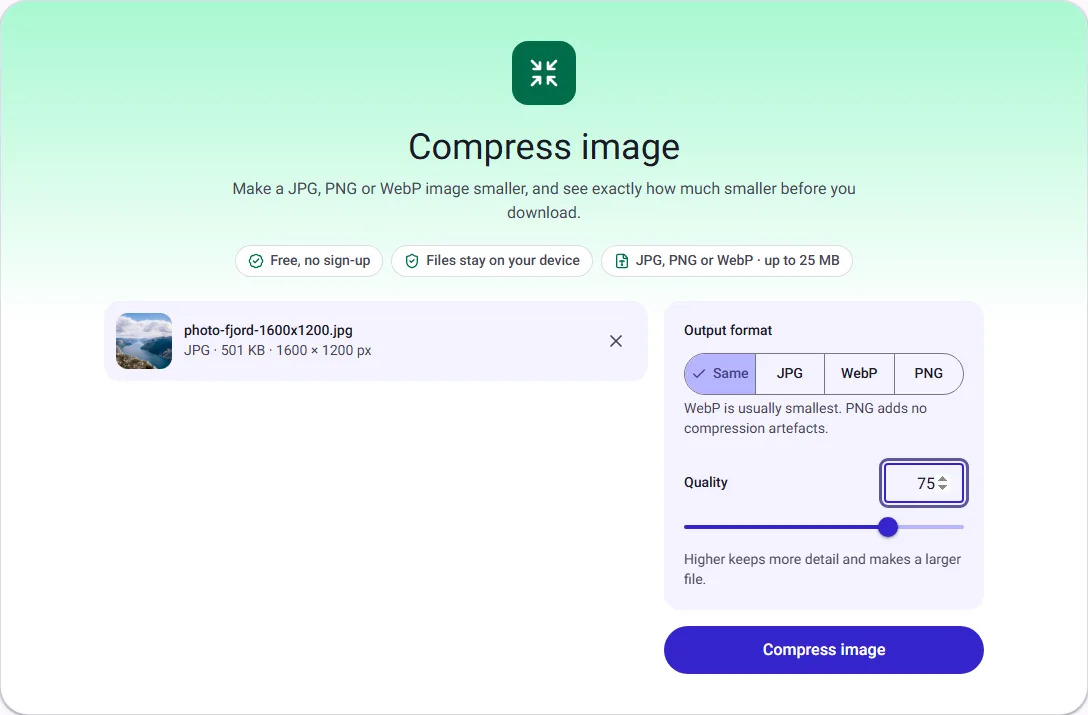
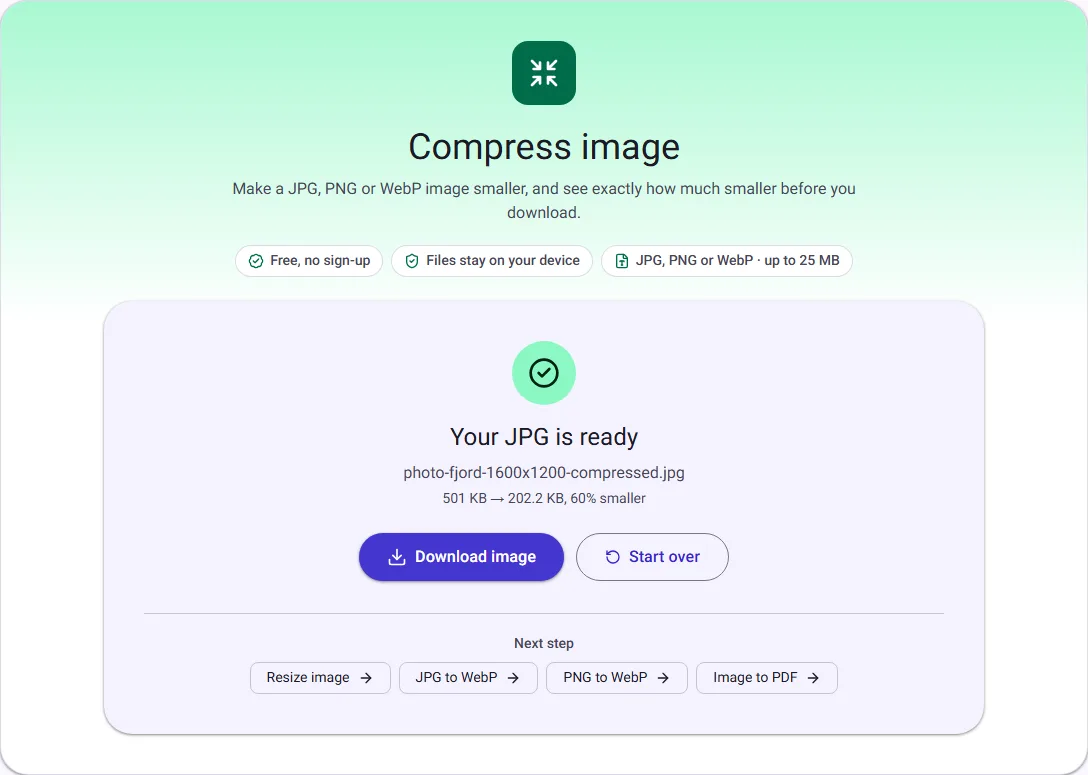
We compressed both resized test photos with our Compress image tool at two qualities, as JPG and as WebP:
| Photo (1600 px wide) | JPG, quality 75 | JPG, quality 60 | WebP, quality 75 | WebP, quality 60 |
|---|---|---|---|---|
| Fjord landscape | 202.2 KB | 142.3 KB | 181.8 KB | 150.9 KB |
| Oak leaves (fine detail) | 117.2 KB | 81.7 KB | 89.3 KB | 72.4 KB |
Two things stand out. The biggest saving came from resizing, not from the quality slider. And WebP was not always smaller: for the fjord photo at quality 60, the JPG came out smaller than the WebP. That is why our tool shows the real size instead of promising one.
Why not just compress the full-size image?
You can, and it helps: the full-size fjord photo compressed at quality 75 became 998.0 KB. But that is still five times larger than the resized and compressed version, and the visitor's browser still has to shrink it on screen, which costs time and battery on a phone.
How small is small enough?
There is no single number, but these targets work well for most sites:
| Image | Width | Aim for |
|---|---|---|
| Full-width hero or banner | 1600–2000 px | 150–300 KB |
| Image in a blog post or article | 1200–1400 px | 80–200 KB |
| Product photo in a grid | 600–800 px | 40–100 KB |
| Thumbnail or avatar | 150–300 px | under 30 KB |
Treat these as starting points rather than rules. A busy, detailed photo needs more bytes than a soft background, so judge by eye at the displayed size.
Other things that help
- Pick the right format. Photos as JPG or WebP; logos, icons and screenshots as PNG or WebP. A photo saved as PNG can be many times larger than it needs to be; see JPG vs PNG.
- Try WebP. It is often smaller at similar quality, but not always. Should you use WebP? covers compatibility. JPG to WebP converts in one step.
- Crop before you resize. If only part of the photo matters, Crop image removes the rest, so you resize and download fewer pixels.
- Remove metadata. Our tools do not copy camera details such as GPS location into the output, which also saves a little space and keeps your location private.
- Do not upscale. Enlarging a small image makes it bigger in bytes without adding detail.
Common mistakes
- Uploading straight from the phone. A 4000-pixel, 3 MB photo in a blog post is the single biggest cause of slow pages.
- Relying on the website builder to shrink images. Some do, many only resize the display and still send the full file. Check the file size your page actually downloads.
- Compressing the same image twice. Each JPG save adds blur. Resize and compress the original once.
- Judging quality zoomed in. Look at the image at the size the page shows it, on a phone and on a large screen. If you see blotches in smooth areas such as sky or skin, go up a quality step; if it looks fine, you can often go a step lower.
A quick checklist before you publish
- The image is no wider than about twice its displayed width.
- Photos are JPG or WebP; logos and screenshots are PNG or WebP.
- The file is in the range of the size table above, or you have a reason it is larger.
- It looks right at the displayed size on a phone and on a large screen.
- It has a short, descriptive file name, such as
fjord-view-from-preikestolen.jpg, and alt text that describes it, which helps both search engines and people using screen readers.
Questions people ask
Will resizing make my photo blurry? Not at the displayed size. You are removing pixels the screen could not show anyway.
Does the website need WebP? No. Every browser shows JPG. WebP is an optional extra saving.
Are my images uploaded? No. Resize image and Compress image work inside your browser tab and your photos never leave your device.
How we measured
On 30 September 2026 we used our own Resize image tool (Lanczos resampling, saved as JPG quality 90) and then Compress image in Chrome, on public-domain photos from Wikimedia Commons: a fjord landscape (CC0) and oak leaves with flowers (CC0). On 17 October 2026 we repeated the fjord resize and the quality 75 compression for the screenshots and got the same sizes. The size targets table is our guidance, not a measurement. Sizes are the downloaded files, in KB of 1024 bytes.

